<<-- Introduction | <-- World Map 3 | Old Forest -->
Before going into the Maze (the first of the second-tier dungeons that we'll be doing), we decide to sell stuff in Last Hope. We've got a few choices for which store to use for that. At level 15, with the world's crappiest gloves, we decide to look for a store that might have better gloves in it.
Rila's Leather sounds like a good candidate. As it turns out, though, it only has belts, boots, and leather armour. One of the pairs of boots is not too bad (wanderer's iron boots of speed), but we've already got boots with a speed bonus (albeit half what the others have), and it's not worth blowing our entire purse on that.
So we just sell the battleaxes and daggers and other crap we don't need.
On a whim, we decide to check the store called Toxar Alchemical Tailor a bit to the east, thinking maybe that one will have some gloves. Nope -- just belts, cloaks, and a robe. Oh well. We'll just wait for some better drops, or some more levels before opening other stores.
On the wilderness map just west of Last Hope, we find a wandering bear. A few bonks on the head, and we're able to grab its paw. One more alchemist ingredient done.

Heading up toward the Old Forest, we spot our first adventurer party. We're not badly equipped for our level, but the risk is still pretty high on these. We'd prefer to stay alive... so we head south, around the lake, trying to get past these guys.
We make it into the Maze without incident.

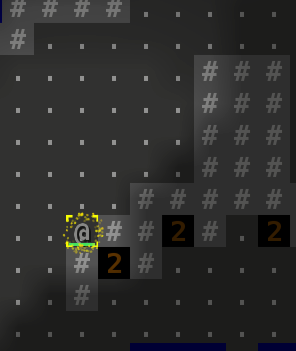
There's not much to say about the Maze's layout that the name doesn't already tell you. It's dark, and it's all corridors -- no open rooms at all. We keep the Summertide Phial on for the light radius and illumination power.
We're going to run into a lot of rogues here, and some minotaurs. Neither one is a serious threat, primarily because it's almost impossible to get surrounded in the Maze (most of the time, only two monsters can be adjacent to you). The rogues can pour out some poison damage, and the minotaurs can confuse. We'll have to be a little bit cautious, but we're certainly strong enough for this.
The first item we find is a shocking steel shield, which has 11 points of retaliation damage. But the shield we've got now has +42 Life, +5 nature damage on hit (melee), 5% nature resist, and 11% fire resist. The steel is slightly better Defense, but we decide to keep the shield we've got.
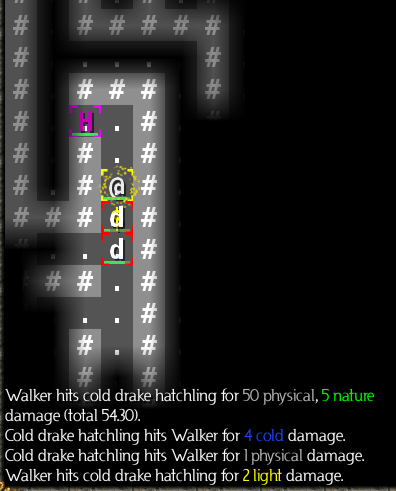
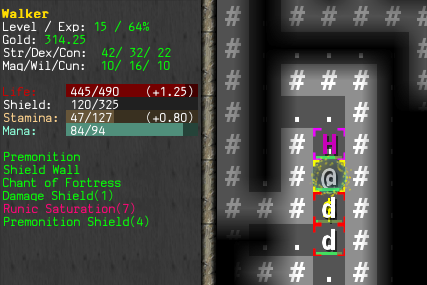
We kill a pack of cold dragon hatchlings, using the Regeneration after the first 3 have lightly wounded us. Then a blue ooze, which splits into multiple oozes, occupies us for a little while.
After that, we finally find some gloves after all:
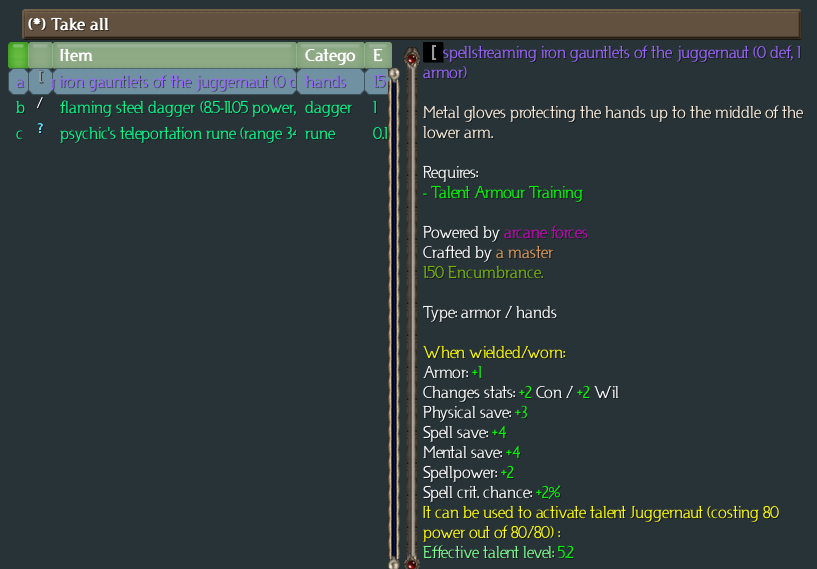
These were dropped by a gelatinous cube. The gloves don't have the healing and Life regen penalty of our current gloves, so we wear the new ones. We'll probably never remember to use the Juggernaut ability, but at least we'll heal at normal speed now. The teleport rune has a slightly lower cooldown than the one we bought in Elvala, so we swap that in too.

A pack of rogues in the southern part of the first level gives us a good fight. One of them has a Sun infusion and blinds us for a bit. We keep swinging wildly until the blindness passes... or rather, we keep pressing the direction key until we bump into a wall and time stops passing. Then we attack in a different direction, at which point the blindness wears off, and we're able to resume a better tactical position. We use Shattering Shout a few times as well, since there are quite a lot of them all bunched together.
After they're dead, we use the Wild infusion to cure an insidious poison effect we've picked up, and Regeneration to heal, while we pick up all the gold they dropped. They also left us a spellplated steel shield of acid resistance, which we decide to grab as a potential swap-in item later.
We also find an ice ant on level 1, and take its stinger (alchemist ingredient). We're still nowhere near completing any of the elixirs, though.
We take the stairs to the next level as soon as we find them.
On level 2 we find another pack of rogues, and pick up another insidious poison effect mid-fight. This time we see it happen, and cure it before it does too much damage. Eventually they all meet their end, although we exhaust all our Stamina in the process. After resting, we take their loot and move on.
The entire southern branch of the second level turns out to be a dead end, and we have to backtrack all the way to the stairs and take the eastern branch instead.
We find a duelist's shielding rune (absorb 146 for 4 turns). This is our first shielding rune, and not a bad one at all. But for now, we'll just hold on to it.
On level 3, we find a brawler's shielding rune (absorb 325 for 4 turns). Wow... now that one is really good. We're quite glad we didn't use the first one! We decide this rune is so good that we replace the teleport rune with it. This will remove our emergency escape option (for the time being), but it gives us tremendous survival capability to match.
Shielding runes are instantaneous. This means that we can trigger them in the middle of a fight without losing a turn. It also means they can be used when we're confused, or frozen (although 100% stun resistance would prevent freezing), and it will never fail.
We finish levels 3 and 4 without major issues. There are more rogues, and a couple minotaurs, as expected. We use the shielding rune once, when we're blinded by an assassin with a Sun infusion while fighting a minotaur, but it wasn't even necessary.
We rest before heading to level 5, where the boss (another minotaur -- are you surprised?) awaits us.
Some white oozes on level 5 drop the first attack rune we've seen - a sneak's heat beam rune (185 fire damage). It's not a bad one, if we were into attack runes. But we won't be using a slot on this. As with all infusions and runes we find that we don't want to use, we'll hold on to it for disposal later.
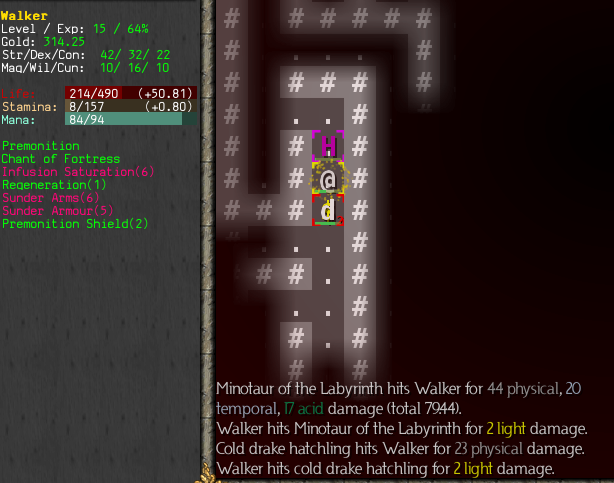
The boss sneaks up on us while we're engaged with some dragon hatchlings. This isn't the ideal time to encounter him, as we're a bit low on Stamina, and our Shield Pummel's on cooldown for another 4 turns. But we have additional resources.
We take another swing at the hatchling, letting the minotaur come toward us around the corner. Then we hit that Shielding rune. Then we Assault the minotaur (for 206 damage). He uses a Crush on us; we resist whatever its side effect is, and our Shield absorbs about 90 points of damage (234/325 left). If the boss uses up all his hard-hitting talents on our rune shield and leaves us fully healthy, we'll be quite pleased.
We make a regular attack against the minotaur (52 damage), and he uses Sunder Arms, which we also resist. Premonition pops up a shield against temporal damage. Temporal? Yeah, temporal... he must have a paradox weapon. The log also says we're taking acid damage from him -- both from his attacks, and from retaliation (in addition to temporal retaliation). Sounds like he's got a weapon with two greater egos (acid and temporal on-strike and retaliation). Well, we'll just have to kill him, won't we?
Another swing of our club (54 damage), and he uses Sunder Armour, but misses. Defense is truly wonderful stuff.
Now Shield Pummel is ready, so we hit him with that (total 51 damage), stunning him. He hits us in return, but our shield's still holding up.
Another regular attack (43 damage), but our shield crumbles, the stun wears off, and he hits us for 39 damage (5 physical, 18 temporal, 19 acid). Note how much our armour is helping us against the physical damage, and how little it's helping against the elemental add-ons.
We hit the Regeneration at this point, and he attempts a Stunning Blow, but misses. We use another Assault, for 191 damage, and take about 44 in retaliation (3 each of temporal and acid damage). We're winning, but it's not a trivial fight.
We make another attack (47 damage), and the minotaur uses a Healing Infusion. Oh, goody. The log doesn't say how much it does, but we think we saw a yellow 222 flying out of him. This may drag on for a little while longer than we expected.
We attack, and he misses. Shield Pummel rolls a critical hit on the first strike, but misses the second strike. He tries Crush but misses. We attack, and hit; the cold drake attacks, misses, and we Riposte and kill it. The minotaur uses Sunder Arms, and this time he connects, doing 40 damage and reducing our "attack" (is that accuracy? damage?) by 6. Our current Wild infusion doesn't remove physical effects, so we don't bother trying.
We attack, and he tries a Sunder Armour, which we resist (but we still take the 41 damage). Another attack, and he hits us again. Then Assault for 187 damage, and the club confuses him, causing his next attack to fail.
We're effectively out of Stamina now, but he's below half health, and our shield's almost ready to use again. Another regular attack from us, and then another lost attack from him due to confusion. We hit the Shielding rune again.
Our next attack hits, and he fails to use Crush due to confusion. We've got just enough Stamina for a Shield Pummel, but it brings down our Shield Wall when Stamina hits 0. The minotaur is confused and fails to use Attack. At this point it's just going to be regular attacks from us; I don't know how much Stamina he has.
Four regular attacks later, he's at 19% Life, our shield's down, we're Pinned to the ground (so what? we weren't going anywhere...), and our Regeneration is ready to use again, so we do that. His Stunning Blow misses, and we make four more attacks against him.
That's apparently a level 18 hatchling beating on our backside. But the boss is almost down. Three more regular attacks, and he finally drops. We level up to 16, and he drops a pile of goodies.
An Assault and a regular attack finish off the hatchling, and we grab the dragons' gold and the minotaur's stuff.

There's that axe he was using on us -- caustic dwarven-steel battleaxe of paradox (31-46.5 power, 2 apr). It would be a really nice one for a class that preferred two-handed weapons. The cloak is an interesting swap-in item, as it has 11 Defense, 11% light resist, and 11% fire resist, but it has negative confusion resist and light radius. (Also a stealth bonus, but we have no stealth.)
But the real prize, of course, is the hat:
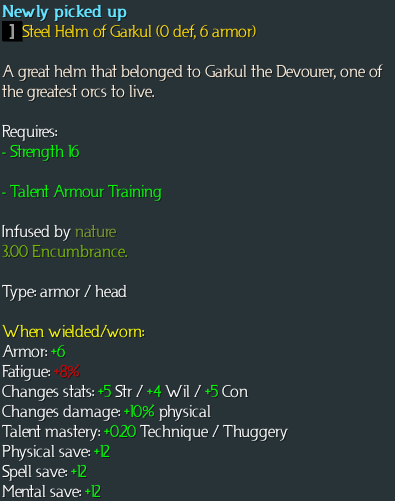
We wear that, replacing the champion's leather cap. There are trade-offs, but Garkul's helm is better overall.
For level-up, we put 2 points in Strength and 1 in Dexterity. The class point goes into Step Up (3/5), and the generic point in Combat Accuracy (4/10).
We explore more of the level, bringing Shield Wall back up after a couple corridors. We find a regular minotaur, and a malotaur, who hits us with a Fireflash spell. We use the Shielding rune after that, and finish him off.
Another regular minotaur, and as soon as we Assault that one, a bloated horror with a shield phase doors next to us.

We hit Greater Weapon Focus, and Shield Pummel it, stunning it and getting one extra blow from the Focus, but not bringing the shield down. We raise our own shield, and continue with regular attacks; its shield drops after the first one.
Three more attacks bring it to 38% Life, and an Assault finishes it. The minotaur is quickly dispatched as well, followed by an anaconda. We find an invisibility rune on the ground nearby, and then rest.
After a pack of lightning dragon hatchlings and a few rogues, another minotaur blinds us, and then we remember that Sun infusion blindness is a magical effect (we think?). The Wild infusion cures it. Another minotaur, a snake, and we reach the end of the Maze, and take the "teleporting circle" back to the surface.