<-- Introduction | Trollmire 1 -->
There are some choices to make even before we begin playing. Character creation is your first chance to influence how the game will play.
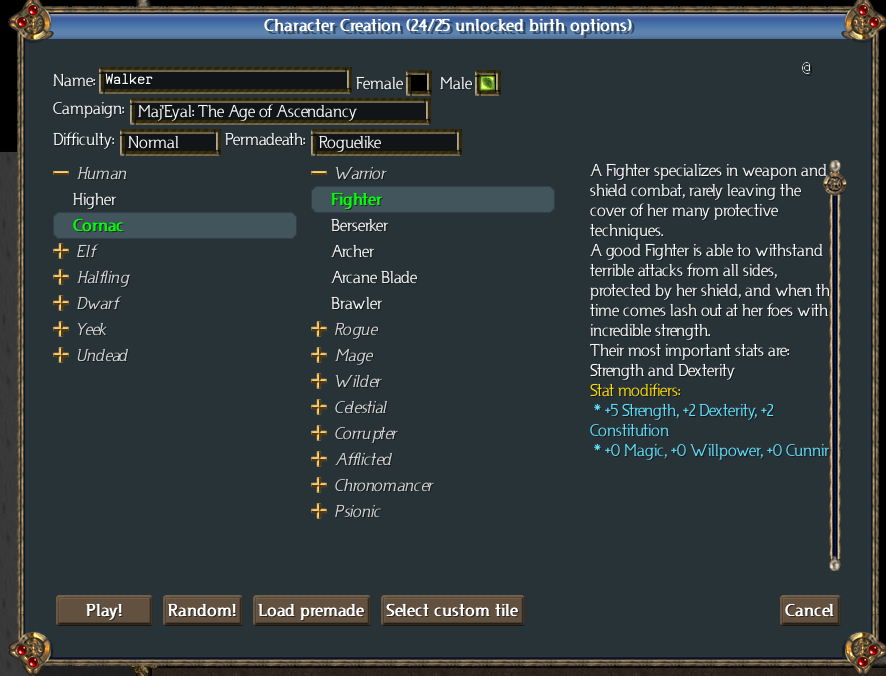
We're going to be playing a Cornac Fighter. This is one of the combinations that are available even without unlocking anything. Cornacs are the baseline human (+0 to all stats), but they get an extra talent category point, which we'll be using later. The Fighter is a defensive warrior, heavily armored, and extra-durable.
Fighters don't deal quite as much damage as Berserkers, but our goal here is not to kill monsters quickly, but to avoid being killed. Don't worry, though -- a high-level Fighter can deal out some serious pain. We just have to live long enough to get there.
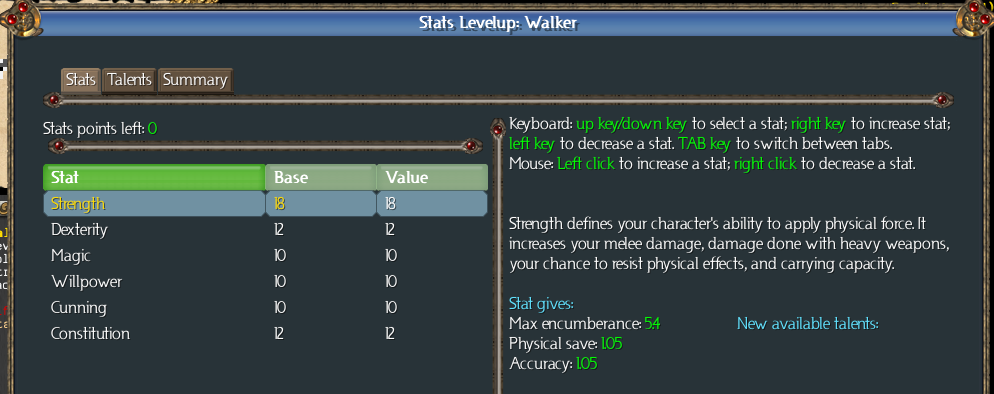
We get three stat points to distribute at the beginning (and another three at each level-up). We're going to put our points into Strength. Strength is what drives our damage with weapons, and also gives us a small bonus to Accuracy (hitting things with weapons). Later we'll want to increase some of the other stats, but for now, nothing is as important as Strength.
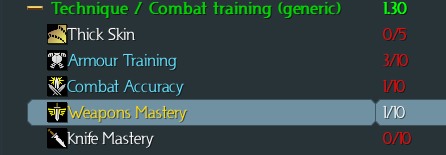
Distributing the talent points is trickier. We've got two class points and one generic point. Our generic points are mostly going to go into the Combat training tree, for quite a while. Right now, the only place we can spend a point within this tree is Weapons Mastery, which will increase the damage we do with weapons (other than daggers). That's great, because we want more weapon damage.
We'll put a class point in Quick Recovery (not shown).

The other class point, we'll put into Shield Wall, taking it to level 2. This improves our Defense and Armour. That leaves the category point. Our plan for this character is to open up both the Battle tactics and the Warcries tree as quickly as possible -- which means level 10, which is the requirement for the first talent in each of those trees. Since we know where the point will be spent, we can spend it now, so we don't have a purple LEVEL UP message nagging us about an unspent point all the time. So we've opened the Battle tactics tree, even though we can't use it yet.

Pressing m lets us remap the hotkeys for our talents. The arrangement of hotkeys is strictly personal preference. I put Shield Wall on Shift-1 (key 25), because as a sustained talent, which should always be on, I don't need to see its icon. I put Shield Pummel on 2, the Regeneration Infusion on - (key 11), and the Wild Infusion on = (key 12). This is simply what I've grown accustomed to, and you should choose an arrangement that makes sense for you.
When I get Greater Weapon Focus, it is going to go on key 1. Overpower will go on 3, Assault will go on 4, Repulsion will go on Ctrl-1 (key 13), Rush will go on 7, Shattering Shout will go on 6, ... no, I don't expect you to use the same bindings I do. Feel free to pick your own. My own preference is to put the talents I use the most often on the first keys (left side), and the talents I use less often on the far right side.
The number of talent icons you can actually see on the screen will depend on your resolution. At 1024x768 you can see 15. At 1280x1024 you can see 18.
Once you've remapped everything, be sure to turn on Shield Wall. It will stay on almost the entire game. Yes, it hurts our damage output a bit, but the defensive bonuses make up for that.
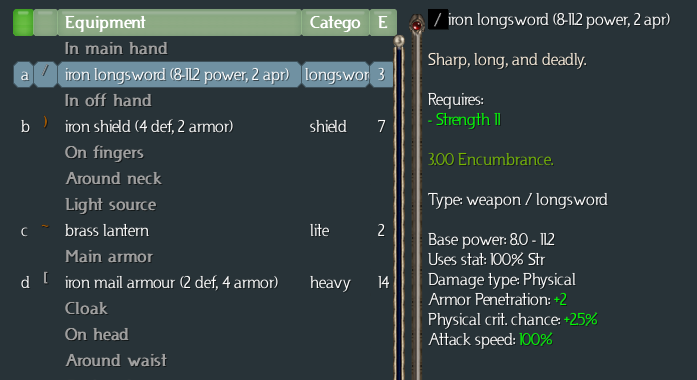
Pressing i shows us our inventory. We start with an iron sword, an iron shield, a brass lantern, and an iron mail armour. The damage range on the iron sword is subject to random variance, and 8-11 is a pretty good one. Luck is with us so far!
We'll be looking for improved equipment throughout the game. Fighters rely heavily on their equipment. The equipment that we'll find is mostly random, so no two games will play out exactly the same way. We'll be adjusting our tactics a little bit based on what we find. But overall, the general plan is the same, and you should be able to adapt this walkthrough to whatever you encounter, within reason.
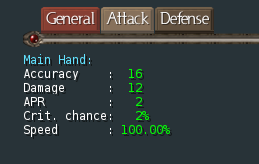
Pressing C brings up the character screen. Right now we just want a quick check on our Accuracy and Damage...
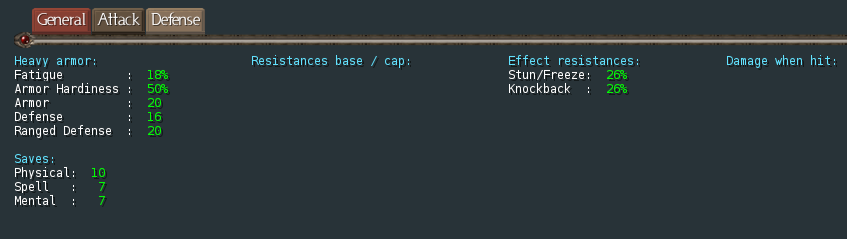
... and our Armor Hardiness, Armor, Defense, and Stun resistance. The Accuracy is not bad for a level 1 character, but we'll certainly be looking to improve that. The Damage is acceptable, but again, it'll go much higher when find some better stuff (and increase Strength). On the Defense tab, we have a 26% stun resistance (that will go up as we improve Shield Wall, and as we find stun resistant equipment). We'll want that to hit 100% at some point, but we'll settle for what we can get, for now.
Our Defense is 16, so any monster with an Accuracy of 16 is going to miss us half the time. Defense goes up with Dexterity, and with Shield Wall, and with equipment. Our Armor Hardiness is 50%, so we can absorb up to half the damage from each attack. Our Armor is 20, so that's also the maximum amount of damage we can absorb. Armor goes up mostly with equipment we wear, and also with Shield Wall. Armor Hardiness goes up as we improve the Armour Training talent. We'll be maxing that one somewhere before level 20.