<<-- Introduction | <-- Kor'Pul | Scintillating Caves -->
After leaving Kor'Pul, we head back to Derth to sell the junk to the gem store. Doing this leaves us with 140.70 gold -- a much larger purse than we've had so far. It may be worth checking a few stores now to see if there are any surprises for us.
We hit the Herbalist (infusion store) in Derth first. And my oh my, it does not disappoint.
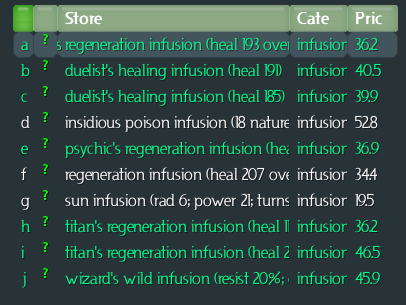
No less than seven triple-digit Regeneration Infusions. That's stunningly good. The RNG must have a special doom prepared for me to compensate for this....
Just one of these beasts ought to be sufficient for a while. We grab the titan's regeneration infusion (heal 224 over 5 turns) with the 15 cooldown -- the best of the lot with our current stats, although future stat investments could change that. That replaces the 60-point infusion we started with, and leaves us with 94.20 gold.
At this point I'm afraid to push my luck, or my purse. I can wait to open the other stores (mostly because I wouldn't be able to afford anything really good anyway).
So we're off to the Heart of the Gloom, in the northern forest.
The gimmick here is that most of the monsters have been afflicted, tainted, or what-have-you. They've been given powers like those of the Doomed and Cursed classes. This makes them quite a bit more dangerous than ordinary monsters of their ilk would be.
But it's nothing that we can't handle.
The most surprising things here are the Creeping Darkness and Dark Tendrils talents. These are Doomed class powers, and while they aren't particularly deadly, they can be irritating. The tendrils will chase after you, and pin you to the ground for a few turns when they hit. The darkness also restricts your line of sight, so you can't see monsters hiding behind them.
When pinned, if there are no monsters nearby to attack, you may have to hit 5 (on the keypad) to rest in place until the pin wears off.
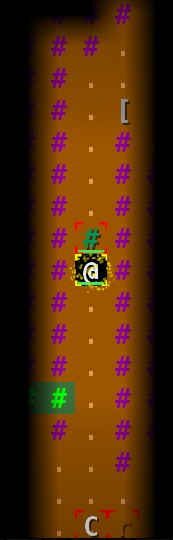
On level 2, we find a lantern:
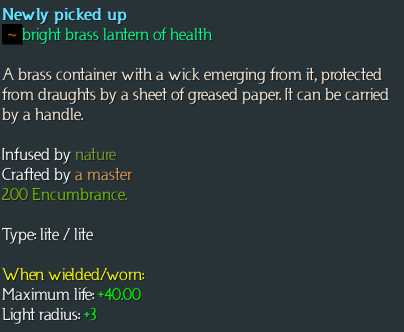
We don't need the light radius or the illumination power of the Summertide Phial right now, since this zone is lit. So the max Life bonus wins, for now. We'll carry both lights, and swap them as needed.
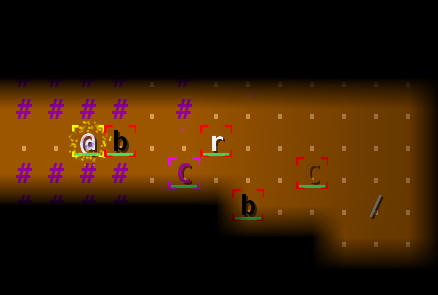
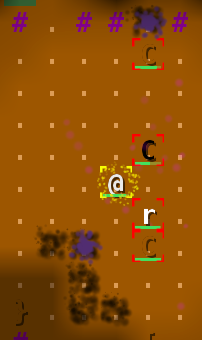
On level 3 (this is a very quick zone), we find the boss, and his shadows. Or someone's shadows, at any rate. Summoning shadows is another Doomed class power; the shadows flit around and attack you. High-level ones can hit pretty hard, but these ones aren't high level for us. We can just swat them.

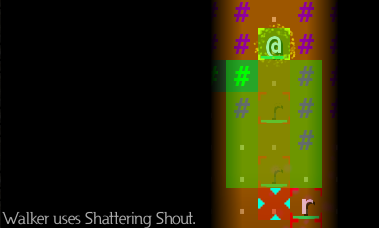
Another Shout helps thin the crowd a bit.
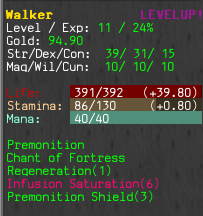
Speaking of Shouts, how come I have so much Stamina... oh, my Shield Wall is down. I don't know when that happened -- I might have run out of Stamina at some point, which would do it; or maybe something hit me with an effect-removing talent. We'll reactivate that now (it's not on cooldown, so it must have been at least 30 turns ago).
In any case, the boss goes down, and we hit level 12.
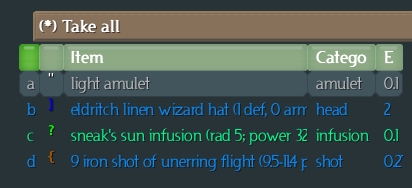
There's the Feathersteel Amulet, finally. We'll wear that because we have no other useful amulets at all, currently. Normally we'd wear something else most of the time, and carry this as a swap item for lugging loot out of a zone, since it has a carrying capacity boost. But the Fatigue reduction is also nice for us.
We put our stat points, one each, into Strength, Dexterity, and Constitution. We buy Assault and Unending Frenzy, and put the generic point into Armour Training (now at level 9/10).
For those who are new to Fighters, allow me to introduce to you: Assault. The pinnacle of a Fighter's single-target damage arsenal, this talent has a 6-turn cooldown, and Stamina cost of 16 (plus Fatigue penalty), and performs a shield strike for 131% of normal damage. If that hits, you get two automatically critical weapon strikes. Six turns later, you get to do it again... probably to someone else, because the first guy's dead.
We don't need to put any more than 1 point in this talent, either. It's what we call a one-point wonder. Additional points just raise the shield strike's damage a little bit. We're going to be putting our upcoming talent points into Shield Wall, Shattering Shout, and (pretty soon) Step Up.
We take a quick run through the rest of the level to clear it out and grab any sellable loot. We find a mule's copper ring (swappable carrying capacity), and a bright brass lantern of repulsion (swappable +2 Magic), but nothing we'd consider using full-time.
And that's the end of this zone.
Oh, wait... I do remember why my Shield Wall was down. It's because I had accidentally hit x and swapped out my weapon and shield. I had swapped them back, but hadn't turned Shield Wall back on yet. Man, that's annoying.