<<-- Introduction | <-- Trollmire 2 | Heart of the Gloom -->
We use the Rod of Recall to exit from Bill's lair, and appear back on the world map after running back and forth a bit. We head south to Derth.
After selling most of the stuff we're carrying, we're left with a handful of swappable hats and some lightweight valuables for later.
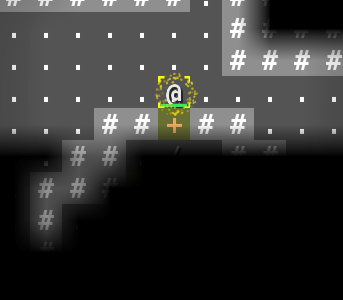
Our next stop will be the ruins of Kor'Pul, west of the Trollmire.

This zone has a traditional dungeon layout, with dark corridors leading to rooms (either dark or lit). We were fortunate enough to find the Summertide Phial earlier. Since we have a lot of space on our hotkey bar right now, let's map a hotkey to it. We press i to bring up inventory....
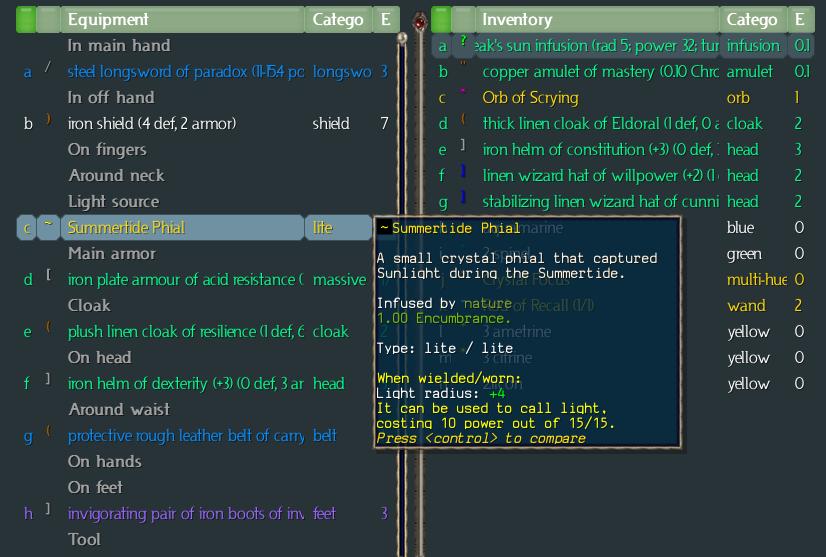
While hovering on the Phial, we'll hit whatever hotkey we want to assign it to (I'm going to use 5 for now). This puts the Phial on our hotkeys for quick activation. It can also be activated (used) by pressing u and then selecting it from the equipment/inventory lists.
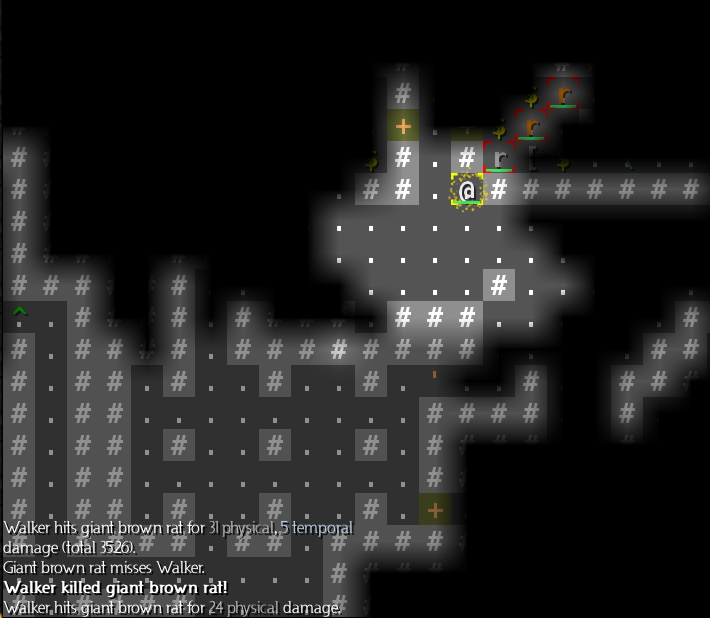
A skeleton. These vary in power quite a bit, depending on what weapons or runes they happen to be generated with. The low-level ones we are likely to find in Kor'Pul are not a major threat to us, since we're about twice as high a level as we should be for this zone. (All of the first-tier zones are geared toward low-level characters, and we're quickly headed out of the low-level category.)
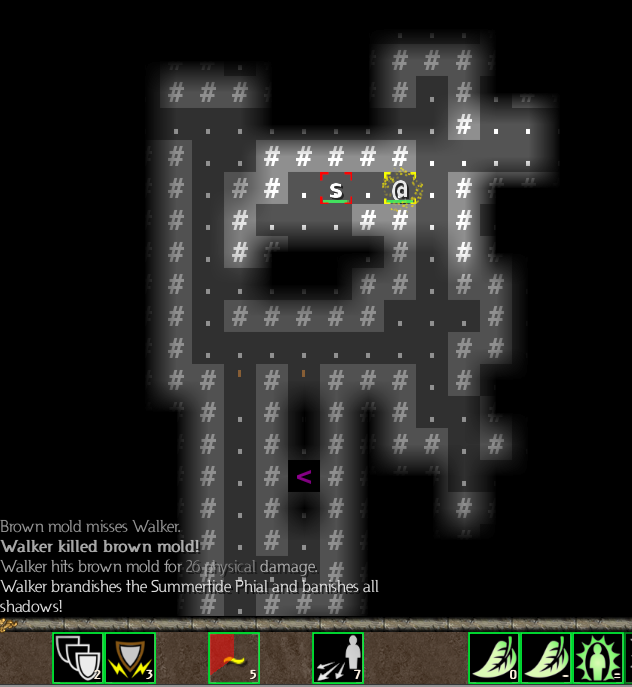
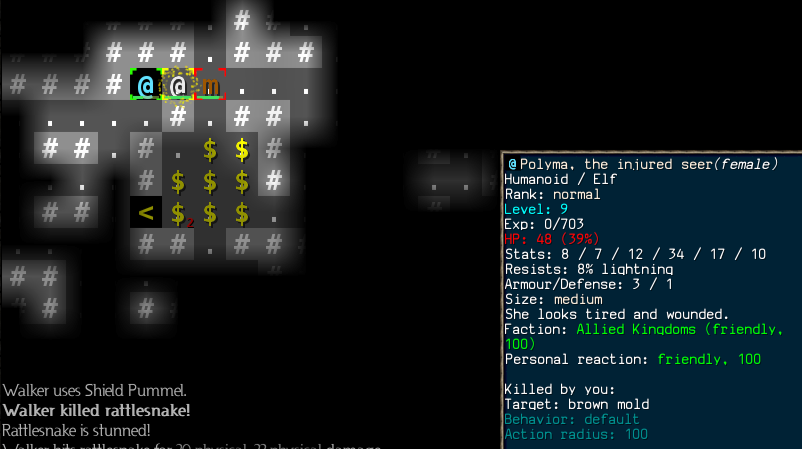
Here's a mixed assortment of monsters. Let's see if Repulsion works on the mold and the jelly.
The jelly goes flying; the mold stays put. We can finish off the mold and then face the mobile opponents one at a time through that narrow opening.
Oh, it's a mobile jelly after all... some of them move, and some don't. Let's Overpower the rogue, then, as it's the biggest threat. The Overpower kills it, leaving us facing the jelly and the white snake. Each of them dies in a single regular attack.
Yeah, we're slightly overleveled for Kor'Pul. Well, too bad for the monsters.
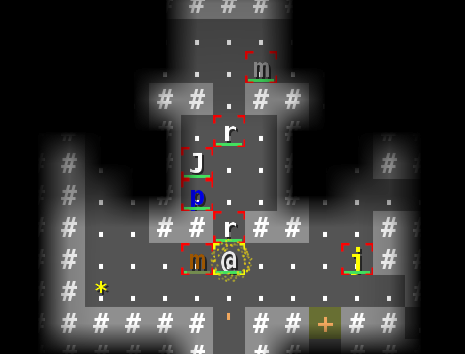
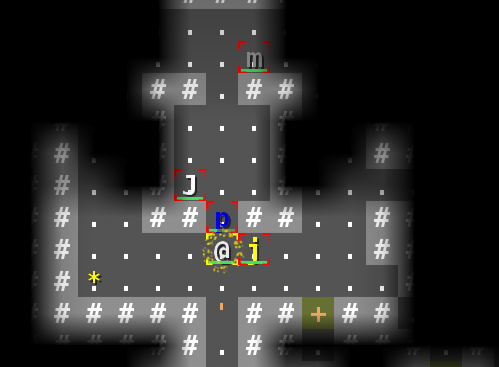
Look at all the rats! And gold! This is actually a vault, a special room with a predefined layout and (typically) better than average goodies in it. There are certain vaults that can be generated in each zone, and this is one of the Kor'Pul vaults.

After killing the rats on this side, we can get in to see the loot. There's another half of the vault over on the the west, through the other door.
Surprise! More rats.
The digger on the eastern side turned out to be an iron pickaxe of deeplife (dig speed 19 turns) with 11% confusion and 11% blindness resist, 5% darkness resist, and +1 infravision. That's a nice upgrade.
We also found (on the west side) a Wild Infusion with 15% resistance, cure poison, cure physical, and cooldown 14. Since our current Wild Infusion only cures poison (not physical effects), we'll upgrade this as well. The cooldown is slightly worse, but the resistance is slightly better... not a major upgrade, but still an improvement.
This locked door is another vault. The ellipse shape (you can't see it all yet, but I can tell just from the top half) is one of the most common Kor'Pul vaults. It'll have some tough opponents, potentially much higher level than I am. But I'm going to risk it.
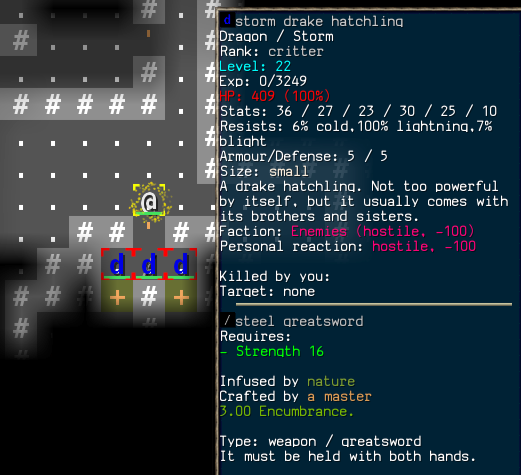
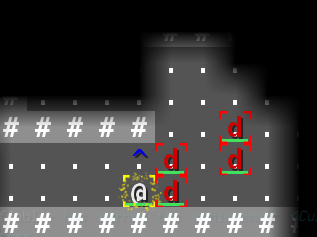
That's unusual! Normally there's one monster in each chamber, but this first chamber has triplet dragon hatchlings. I'll let them come to me, using the narrow doorway as a bottleneck.
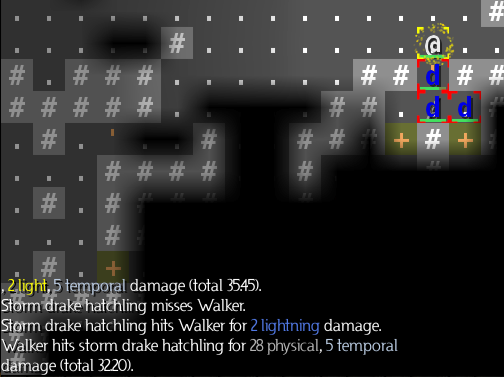
All dragons have retaliation damage, even the hatchlings. That's why I'm taking a couple points of lightning damage when I hit them. But it's not big deal for me; I have good Life and I can wear them down, using the Regeneration Infusions if needed.
Retaliation damage is applied to each physical strike. If I use Shield Pummel, I take the damage twice. If I use Overpower, which does a weapon hit and two shield hits, I'd take it three times. Rogues using Flurry would take it 6 times.

The hatchlings are dead, and we move on to a chamber with this guy in it. Level 21... and we're level 9. That's pretty typical for vaults with locked doors, so if you choose to open them, you know what you're in for.

Stun resistance is very important! And here's what he was guarding, after we finish him off:
Insatiable is one of the so-called greater ego powers that actually kinda sucks. We definitely won't be using this; we'll sell it.
The rest of the vault is actually even less interesting; that skeleton was the strongest monster in it. There's an iron mace of paradox, but we already have a steel sword of paradox, so that's not a worthy upgrade.
A note on materials: almost all the items in this game have a material that they're made of. These materials are tiered. For melee weapons, the materials are iron (tier 1), steel (tier 2), dwarven-steel (tier 3), stralite (tier 4) and voratun (tier 5). There are also tiered materials for leather, and wood, and cloth. Each tier represents a significant jump in power (and often stat requirements).
The fact that we have a tier 2 weapon -- with a good ego power, to boost -- was a nice stroke of luck for us. We're finding a few steel items here and there (typically useless two-handed weapons), but it's still mostly iron right now.

Here's the vault, cleared out. You'll see plenty more like it.
We finish exploring most of the level (enough to see that there are no more vaults, anyway), and then head down to level 2.

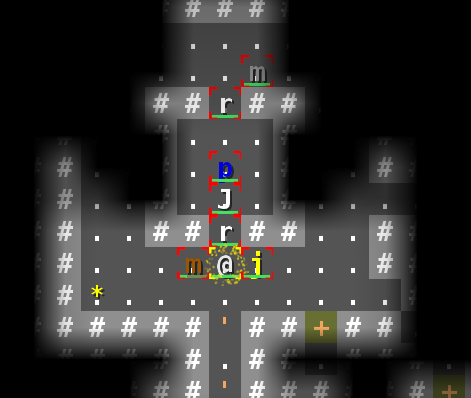
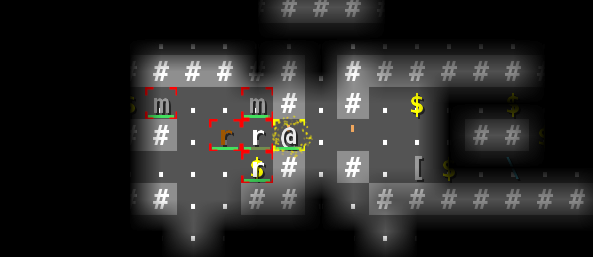
Yup, Cornacs can get escort quests in Kor'Pul. That brown s is a skeleton archer, and the red s is a skeleton mage. (Hey, alchemist quest ingredient!) I'm lucky that the escortee spawned on the side without the monsters. Let's stand here and beat 'em up.

And of course the escortee wandered off... probably found something it could attack and die to, while I'm holding off a 3x3 mini-vault full of monsters.
After taking down the two skeletons, I decide to ignore the snake and head up to see where my oh-so-competent colleague went.

Arrrgh... she circled around to attack the snake from the north. If I head due east and swap places with her, I might be able to save her....
I pull her out of the fight, kill the snake, and head out to find her engaged with the mold... I pull her out of that fight too.
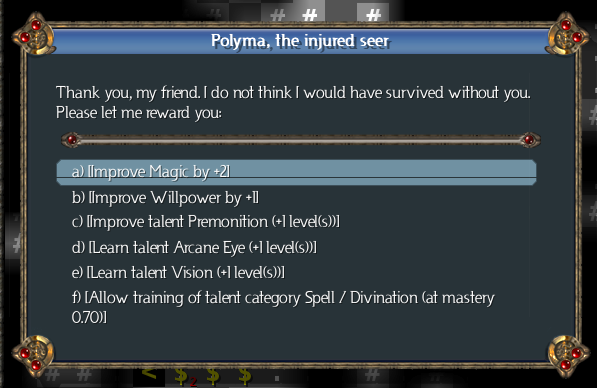
Phew. I'm able to fend off a couple more snakes, and eventually she reaches the portal. This time I'm taking Arcane Eye. I might never have enough Mana to use it more than sporadically (not while Premonition is up, anyway), but the potential monster detection is a great thing to have in reserve.
I head back to the 3x3 minivault to grab the gold and the skeleton mage skull.
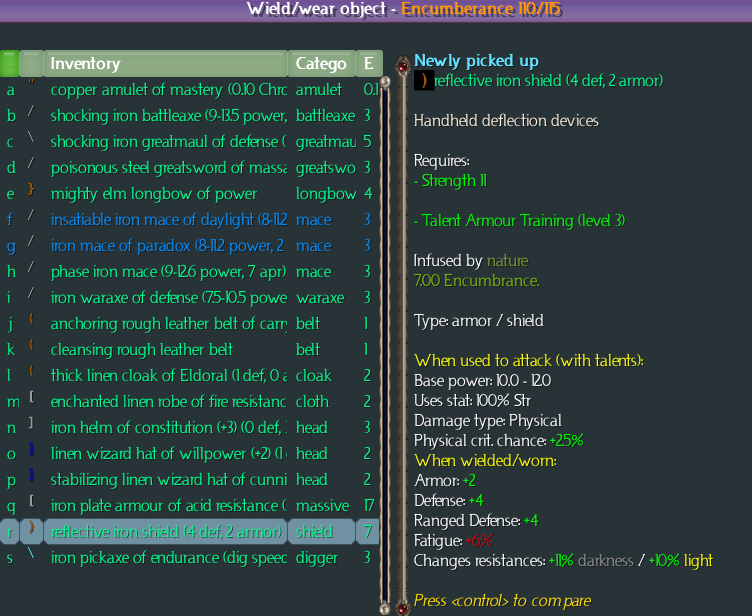
Finally, a shield upgrade. Not a huge upgrade, but better than what we had. Now we just need to find some gloves somewhere....
Shortly after that, we reach level 10. We get an achievement for this... and we also get our advanced talent trees. And a category point. And two class talent points (no generics).
First, we put 2 points in Strength, and 1 in Dexterity.
Then we spend the category point to open up Warcries. And we spend the talent points to buy Greater Weapon Focus, and Shattering Shout.
Greater Weapon Focus gives us 5 turns of an effect that lets us get some extra blows in. Maybe. It's also instantaneous to use. On the other hand, it costs 31 Stamina (and will cost more as our Fatigue goes up). We'll probably use that sparingly, because the Stamina cost is pretty steep.
Shattering Shout is a cone attack, giving physical damage that scales with Strength. It's got a cooldown of 7, and (currently) a Stamina cost of 25. We'll use this on groups of monsters.

Here's a lovely purple weapon. But it's only got half the base damage of our steel longsword. The stat bonuses are nice, though. We'll hold this as a swap item. We won't use it for actual fighting.
There's nothing else of significance here, so we head down to the third and final level.

A small demonstration of our new power. It's going to get stronger later in the game. Much, much stronger.
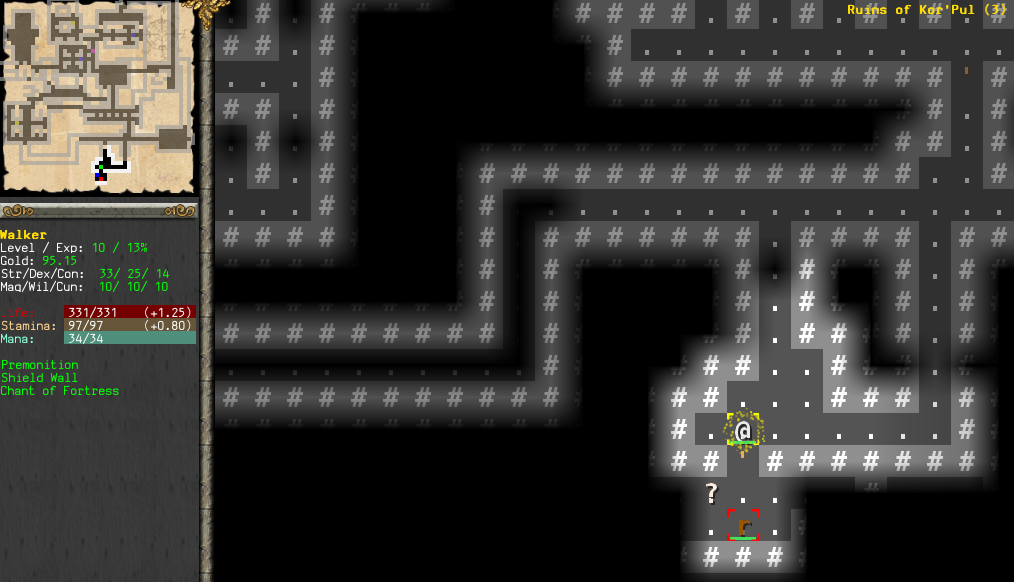
Level 3 proves utterly boring, with no vaults and no significant finds. We open the special room in the south, which leads to the boss.

The Shade is a spellcaster, so we approach with caution. So far he's done nothing, but that'll change.
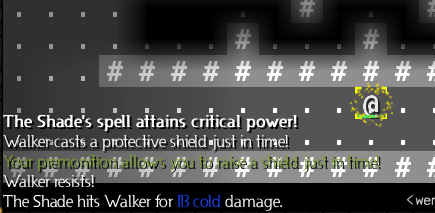
A Freeze spell. And he got a critical hit -- ouch! But we resisted the freezing effect (stun resistance helps against that), so at least we aren't encased in a block of ice. That calls for a hit of the Regeneration Infusion for sure, though.

And a Manathrust as we start to close in. In fact, I think we're close enough now... let's Rush him.

Now things should turn in our favor. Shield Pummel breaks the daze, but stuns him. Briefly. A few more normal attacks, and he's back to the Manathrusting.

He keeps scoring criticals with his attack spells... that's bad, but we're still in good shape. The first regen has run out, so we can tap the second one.
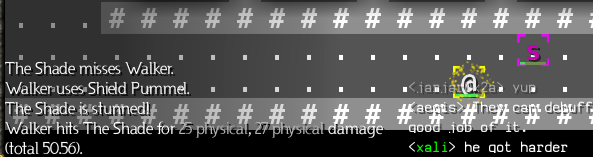
After a few more rounds, a Shield Pummel sends him running. We're quite low on Stamina (the Rush cost is still extremely high, which is the main reason we didn't use Greater Weapon Focus here). We don't have enough Stamina for a Shout, so we'll just have to chase him.
A few turns later, his death brings us to level 11.
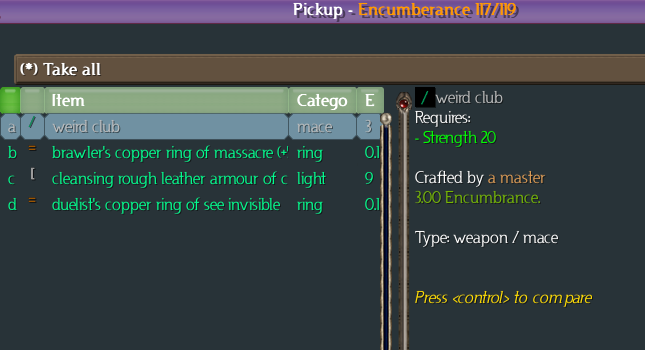
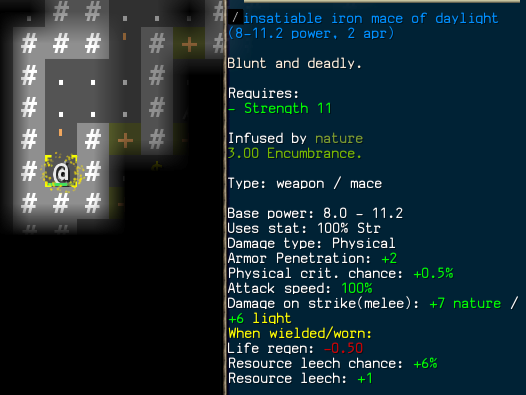
Finally, some rings! No gloves yet, so we still have bare hands... but that artifact mace is a good one.
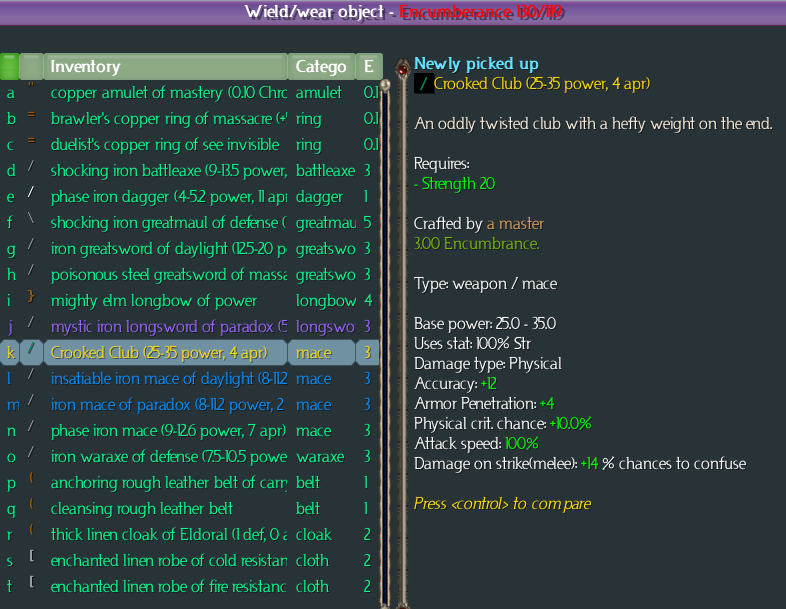
We'll lose our temporal retaliation damage, but the base damage is much higher than what we've been using, and we get a huge Accuracy bonus, and a chance of confusing on hits. This is an excellent upgrade!
The rings give us Strength and Dexterity, as well as a few other little features, and are certainly welcome loot.
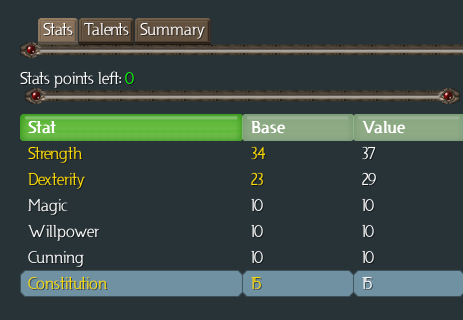
With the rings on, we're already at the breakpoint of 36 Strength that we'll need for the level 12 talents. So we can afford to diversify a bit -- one point in each of Strength, Dexterity and Constitution.
With level 12 talents coming up fast, we'll save the class talent point. The generic, we'll put into Armour Training.
We've got so much junk that we can't even move... we have a belt of carrying in our backpack, but we're already wearing another belt of carrying, and the one in the backpack's only got +2 carrying compared to the one we're wearing. No +carrying boots have dropped yet, and no Feathersteel Amulet, so we'll have to drop something. One greatmaul, discarded.
A quick run through the rest of the boss room turns up some gloves!
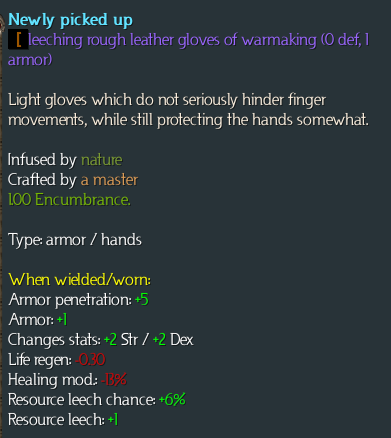
Gah... one of the leech ego powers. The Strength and Dex are nice, though. And we do have Fast Metabolism, to offset the negative Life regen. The real loss here is the -13% healing mod; this applies to Regeneration as well. It means we'll heal more slowly. But I think it's (barely) an acceptable trade-off for now. We'll wear them.
Oh, it looks like we're not quite done here after all. A couple Shouts and some attacks, plus the Regeneration, and the red dragon hatchlings are history. And that's the last of Kor'Pul.
<<-- Introduction | <-- Trollmire 2 | Heart of the Gloom -->